Are you ready to embark on a digital journey to create your own website using WordPress? Fantastic! WordPress is a user-friendly, versatile, and powerful platform that empowers millions of website owners around the world. Before you dive in, though, you might want to set up a local development environment on your Mac. This allows you to experiment, learn, and customize without affecting your live website. In this step-by-step guide, we’ll walk you through the process of installing WordPress locally on your Mac in simple, easy-to-follow terms.
Why Install WordPress Locally?
If you’re eager to start building your own professional WordPress blog website, mastering the art of installing WordPress locally on your Mac is the crucial first step in your exciting journey!
Before we explore the technicalities, let’s briefly discuss why installing WordPress locally is a smart move. When you install WordPress on your Mac, you create a safe playground to:
- Experiment: Try out different themes, plugins, and settings without any impact on your live site.
- Learn: Gain hands-on experience with WordPress development, honing your skills at your own pace.
- Customize: Build and tweak your website offline, ensuring it’s perfect before going live.
Now, let’s get started!
Here are three methods shared in detail with step by step guidelines on How to Install WordPress Locally on Your Mac
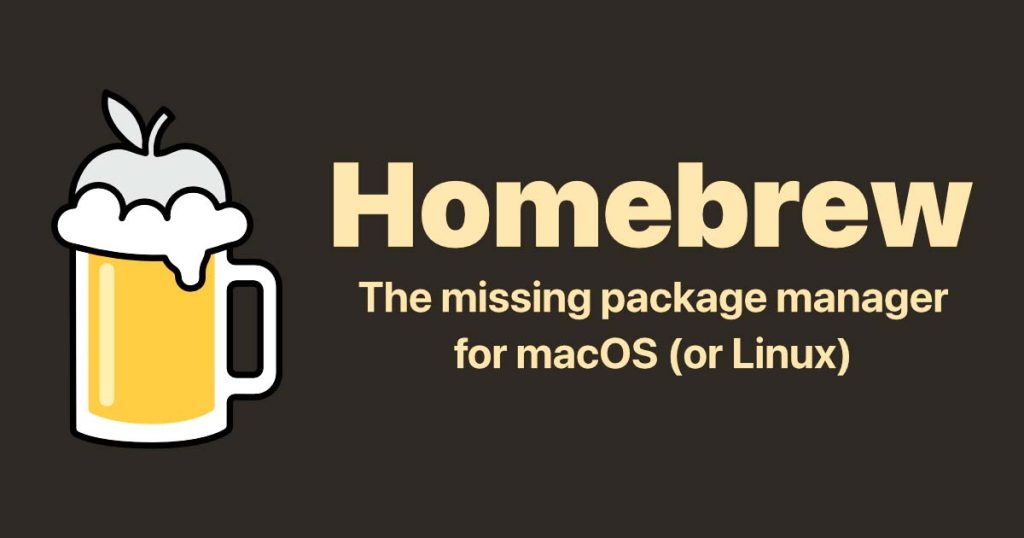
Method 1: WordPress Installation using Homebrew
Homebrew, in the context of technology and software development, refers to a package manager for macOS that allows users to easily install, update, and manage various software applications and libraries on their Mac computers. It simplifies the process of acquiring and maintaining software, making it a convenient tool for developers and users seeking to customize their macOS environments.
Step 1: Prepare Your Mac
Before we can begin, we need to ensure your Mac is equipped with the necessary tools. Don’t worry; it’s a breeze!
Check for Updates
First, make sure your Mac’s operating system is up to date. Updates often contain essential improvements and security patches.
- Click on the Apple logo in the top-left corner of your screen.
- Select “About This Mac.”
- Click on “Software Update” to check for and install any available updates.
Install Homebrew
Homebrew is a fantastic package manager that simplifies software installation on your Mac. It’s a vital tool for the next steps.
- Open your Terminal (you can find it in the Utilities folder within Applications).
- Paste the following command and hit Enter:
/bin/bash -c "$(curl -fsSL https://raw.githubusercontent.com/Homebrew/install/HEAD/install.sh)"
Follow the on-screen instructions to complete the installation.
Step 2: Set Up a Local Server
To run WordPress locally, you need a server environment. We’ll use Apache, PHP, and MySQL – don’t worry, it’s easier than it sounds!
Install Apache
Apache is a widely-used web server that we’ll need to serve your WordPress site.
In your Terminal, run:
brew install httpd
Once installed, start the Apache server:
sudo apachectl start
Install PHP
PHP is the scripting language used by WordPress.
In your Terminal, run:
brew install php
Install MySQL
MySQL is the database system that WordPress uses to store your website’s data.
In your Terminal, run:
brew install mysql
Start the MySQL server:
brew services start mysql
Step 3: Create a Database
WordPress needs a database to store your content. Let’s create one!
Open your Terminal and run:
mysql -u root
You’ll enter the MySQL shell. Now, run the following commands one by one:
CREATE DATABASE mywordpressdb;
CREATE USER 'mywordpressuser'@'localhost' IDENTIFIED BY 'mypassword';
GRANT ALL PRIVILEGES ON mywordpressdb.* TO 'mywordpressuser'@'localhost';
FLUSH PRIVILEGES;
EXIT;
Step 4: Download WordPress
Now, it’s time to get WordPress itself.
- Visit the WordPress download page and click the “Download WordPress” button.
- Once downloaded, unzip the file. You can do this by double-clicking the ZIP file.
- Rename the folder to something memorable, like “mywordpress.”
Step 5: Configure WordPress
Let’s set up your local WordPress site!
In your Terminal, navigate to the folder where you placed your WordPress files. Use the cd command to change directories.
cd /path/to/your/wordpress/folder
Create a copy of the wp-config-sample.php file and name it wp-config.php. This file holds your database configuration.
cp wp-config-sample.php wp-config.php
Open wp-config.php with a text editor and locate the following lines:
define('DB_NAME', 'database_name_here');
define('DB_USER', 'username_here');
define('DB_PASSWORD', 'password_here');
Replace 'database_name_here' with 'mywordpressdb', 'username_here' with 'mywordpressuser', and 'password_here' with 'mypassword'. Save and close the file.
Step 6: Set Up Your Local WordPress Site
Now comes the exciting part – launching your local WordPress site!
In your Terminal, navigate to your WordPress folder (if you’re not already there)
cd /path/to/your/wordpress/folder
Start the PHP server:
php -S localhost:8000
Open your web browser and visit http://localhost:8000. You should see the WordPress setup wizard. Follow the on-screen instructions to complete the installation.
Step 7: Enjoy Your Local WordPress Site
Congratulations, you’ve successfully installed WordPress locally on your Mac! You can now log in, customize, and experiment to your heart’s content without affecting your live website.
If you are still curious How to Install WordPress Locally on Your Mac, here are two other methods for your learning and experience.
Method 2: WordPress Installation using MAMP
MAMP stands for Macintosh, Apache, MySQL, and PHP. It is a popular, free, and easy-to-install software stack that provides a local development environment on macOS for web developers. MAMP includes Apache as the web server, MySQL as the database management system, and PHP for server-side scripting, making it a convenient tool for creating and testing web applications and websites on a Mac computer.

What You’ll Need
Before we get started, let’s make sure you have everything you need:
- Mac Computer: You’ll need a Mac running macOS.
- MAMP: MAMP stands for “Mac, Apache, MySQL, and PHP.” It’s a free, user-friendly software package that makes it easy to set up a local server environment on your Mac. You can download it from the official MAMP website.
- WordPress: We’ll also need WordPress, which you can download for free from the WordPress.org website.
Now that you’ve got your tools ready, let’s dive into the installation process.
Step 1: Download and Install MAMP
- Head over to the MAMP website and click on the “Download MAMP & MAMP PRO” button.
- Choose the free version by clicking “Download.”
- Once the download is complete, open the installer and follow the on-screen instructions. It’s a straightforward process, similar to installing any other application on your Mac.
- After the installation is complete, launch MAMP from your Applications folder.
Step 2: Configure MAMP
Now that MAMP is installed, it’s time to configure it for WordPress.
- When you launch MAMP, you’ll see the MAMP control panel. Click on the “Preferences” button.
- In the Preferences window, navigate to the “Web Server” tab and set the document root to a location of your choice. This will be the directory where your WordPress files will reside. You can create a new folder on your desktop or choose an existing one. Make sure to remember this location; you’ll need it later.
- Next, click on the “Ports” tab and ensure that the default Apache and MySQL ports are set to their default values (Apache: 8888, MySQL: 8889).
- Now, click “OK” to save your changes and close the Preferences window.
Step 3: Start MAMP’s Servers
- Back in the MAMP control panel, click on the “Start Servers” button. This action will launch the Apache web server and MySQL database server. You’ll know they’re running when the icons turn green.
- To ensure everything is working correctly, click on the “Open WebStart page” button. This should open a web page confirming that your servers are up and running.
Step 4: Create a Database
WordPress requires a database to store your website’s data. Let’s create one.
- Return to the MAMP control panel, and click on the “Tools” menu. From there, select “phpMyAdmin.”
- In the phpMyAdmin interface, click on “Databases” in the top menu.
- Enter a name for your database. You can choose any name you like; just make sure to remember it.
- Click “Create” to finalize the database creation.
Step 5: Download and Install WordPress
- Now that MAMP is set up and your database is ready, it’s time to download WordPress. Head over to WordPress.org and click on the “Get WordPress” button.
- After downloading the WordPress zip file, extract it to the document root folder you specified earlier. This will typically be the folder in your MAMP installation directory.
- In the document root folder, you should see a new folder with all the WordPress files. This is where your website will live.
Step 6: Configure WordPress
- Open your web browser and enter the following address:
http://localhost:8888/wordpress(replace “8888” with the port you set in MAMP if it’s different). - You should see the WordPress setup page. Select your preferred language and click “Continue.”
- On the next screen, WordPress will ask for your database information. Enter the following details:
- Database Name: Enter the name of the database you created earlier.
- Username: The default username is usually “root.”
- Password: Leave this field blank.
- Database Host: Enter “localhost.”
- Table Prefix: You can leave this as the default “wp_,” or change it for added security.
- Click “Submit” and then “Run the installation.”
- Provide the necessary information for your website, including the site title, username, password, and email address. Make sure to choose a strong password.
- Click “Install WordPress.”
- Once the installation is complete, click “Log In” to access your WordPress dashboard.
Step 7: Explore and Customize
Congratulations! You now have WordPress installed locally on your Mac. You can start exploring your new website and customize it to your heart’s content.
Feel free to add themes, plugins, and content. Experiment with different designs and layouts until you’re satisfied with your creation. Since this is a local environment, you can make mistakes and learn without any consequences.
Method 3: WordPress Installation using XAMPP
XAMPP is a free and open-source software package that provides a local development environment for web applications. It includes Apache (a web server), MySQL (a database management system), PHP (a scripting language), and Perl, allowing developers to work on web projects on their local computer before deploying them to a live server.

Step 1: Download and Install XAMPP
The first step is to download and install XAMPP, which will provide the necessary environment for WordPress to run.
- Visit the XAMPP website and download the macOS version of XAMPP.
- Once the download is complete, open the installer by double-clicking the downloaded file.
- Follow the on-screen instructions to install XAMPP. You may need to provide your administrator password during the installation process.
- After installation, launch XAMPP by opening the XAMPP Control application.
Congratulations! You now have XAMPP installed on your Mac.
Step 2: Start the Apache and MySQL Servers
To run WordPress locally, you’ll need to start the Apache web server and MySQL database server included in XAMPP.
- In the XAMPP Control application, click the “Start” button next to both Apache and MySQL. This action will initiate the servers.
- If the servers start successfully, you’ll see green checkmarks next to their names.
Step 3: Create a Database for WordPress
Now that your servers are up and running, it’s time to create a MySQL database where WordPress will store its data.
- Open your web browser and go to http://localhost/phpmyadmin. This will take you to the phpMyAdmin interface.
- Click on “Databases” in the top menu.
- Enter a name for your database in the “Create database” field. You can choose any name you like, but make sure to remember it. For this example, let’s call it “mywordpress.”
- Click the “Create” button to create the database.
Your database is now ready to be used by WordPress.
Step 4: Download WordPress
With XAMPP and the database set up, it’s time to download WordPress.
- Visit the official WordPress website and click the “Download WordPress” button. This will download the latest version of WordPress to your computer.
- Once the download is complete, locate the ZIP file and extract its contents. You should now have a folder named “wordpress.”
Step 5: Move WordPress Files to the XAMPP Directory
To make WordPress accessible through your local server, you’ll need to move the WordPress files to the appropriate directory.
- Navigate to the folder where you installed XAMPP. By default, it’s in your “Applications” folder.
- Inside the XAMPP folder, find the “htdocs” folder and open it.
- Move the entire “wordpress” folder you extracted earlier into the “htdocs” folder.
Step 6: Configure WordPress
Now, it’s time to configure WordPress to use the database you created earlier.
- Open your web browser and go to http://localhost/wordpress. This will start the WordPress installation process.
- Select your preferred language and click “Continue.”
- On the next screen, WordPress will inform you that it needs the database name, username, password, database host, and table prefix.
- Database Name: Enter the name of the database you created earlier (e.g., “mywordpress”).
- Username: By default, it’s “root.”
- Password: Leave this field blank.
- Database Host: Enter “localhost.”
- Table Prefix: You can leave it as “wp_” or change it for added security.
- Click the “Submit” button to proceed.
- WordPress will now connect to your database. If the connection is successful, click the “Run the installation” button.
- On the next screen, enter your site’s information, including the site title, username, password, and email address. Make sure to choose a strong password.
- Click the “Install WordPress” button.
- WordPress will finalize the installation, and you’ll see a success message. You can now log in to your WordPress dashboard.
Step 7: Access Your WordPress Dashboard
To access your WordPress dashboard and start building your website, follow these steps:
- Go to http://localhost/wordpress/wp-login.php.
- Enter the username and password you created during the installation.
- Click “Log In,” and you’ll be taken to your WordPress dashboard.
Congratulations! You’ve successfully installed WordPress locally on your Mac using XAMPP. Now, you can start designing, creating content, and experimenting with plugins and themes to build your dream website.
Conclusion
In this article, we’ve taken you through the process of installing WordPress locally on your Mac using HomeBrew, MAMP and XAMPP, step by step. We hope this guide has made the process easy to understand, even if you’re not a tech guru.
Creating a local WordPress environment is a fantastic way to experiment, learn, and develop your website-building skills without the pressure of going live on the internet. So, get started, have fun, and let your creativity flow!
Now that you’ve successfully set up your local WordPress site, you’re well on your way to becoming a confident website creator. If you decide to take your website live in the future, you’ll be well-prepared thanks to your experience with WordPress.
Remember, the world of web development is vast, and there’s always more to learn. You must also learn the process of Installing WordPress on Windows, And get aware about the 8 Best Alternatives to WordPress
So, keep exploring, stay curious, and enjoy your WordPress journey!
If you have any questions or need further assistance, feel free to explore the official MAMP documentation or the WordPress Codex. These resources can provide additional context and support for your WordPress adventures.
Happy WordPressing!